Visix Setup Instructions
Setting up new Visix locations and users
- Apply ITWS workstation image
- Add Visix Engage software from Software Center
- Configure Engage Software
Instructions back on bench. Work with Randy or Brian for further assistance.
Not necessary is sub-org is already created, or if they're using an existing Message Playlist
Use Visix Manage - https://kuvisix.ku.edu/manager
- Create Sub-org (if appropriate)
- Administer
- Add Sub Org
- Give sub org names
- email not necessary
- email not necessary
- Administer
- Create Playlist(s)
- Administer --> Playlist
- Leave on "Message" at top drop-down
- Add button
- Name the Playlist
- descriptive of unit/purpose, EX: Engineering FS Playlist (FS = "full screen")
- descriptive of unit/purpose, EX: Engineering FS Playlist (FS = "full screen")
- Put in correct sub-org
- Upload sample image for playlist
- Administer --> Playlist
Use Visix Design app - login with Remote Desktop to itprdmpsrelay.home.ku.edu
- Add new layout
- Save with name, in sub-orgs
- Save with name, in sub-orgs
- Add new Zone to layout
- Add Playlist (which you made above) - under Zones - to zone
- Sync
- Make sure (close/open if needed) that playlist items are previewing on preview screen
- Administer --> Playlist
- Choose Layout from top Drop-down
- Click Add button
- Name Layout Playlist
- dept, EX: Engineering FS Layout Playlist
- dept, EX: Engineering FS Layout Playlist
- Choose Layout from top Drop-down
- Manage --> Playlist
- Choose Layout from top Drop-down
- Highlight new Layout Playlist
- Schedule Layout - apply appropriate Playlist created earlier
- Choose Layout from top Drop-down
- Apply Layout to PC
- Manage --> PC Player
- Select Player
- "Change Layout Playlist" button
- Manage --> PC Player
Add user if they're not yet in the Visix Manager
- Administer --> Users
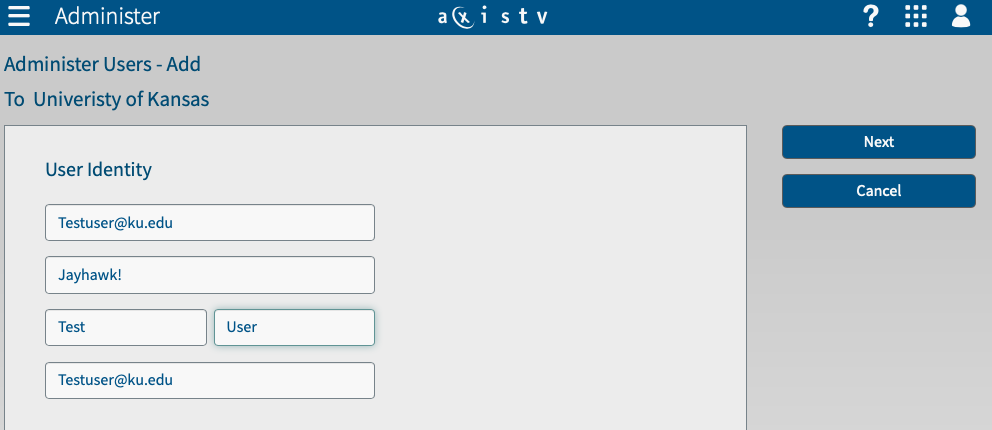
- Click Add button
- Username and email are same - primary email - Ex. neilr@ku.edu (not n359r827). Include @ku.edu in both.
- Make AxisTV Design password Jayhawk! for everyone.
- Enter first/last name

- Click Next
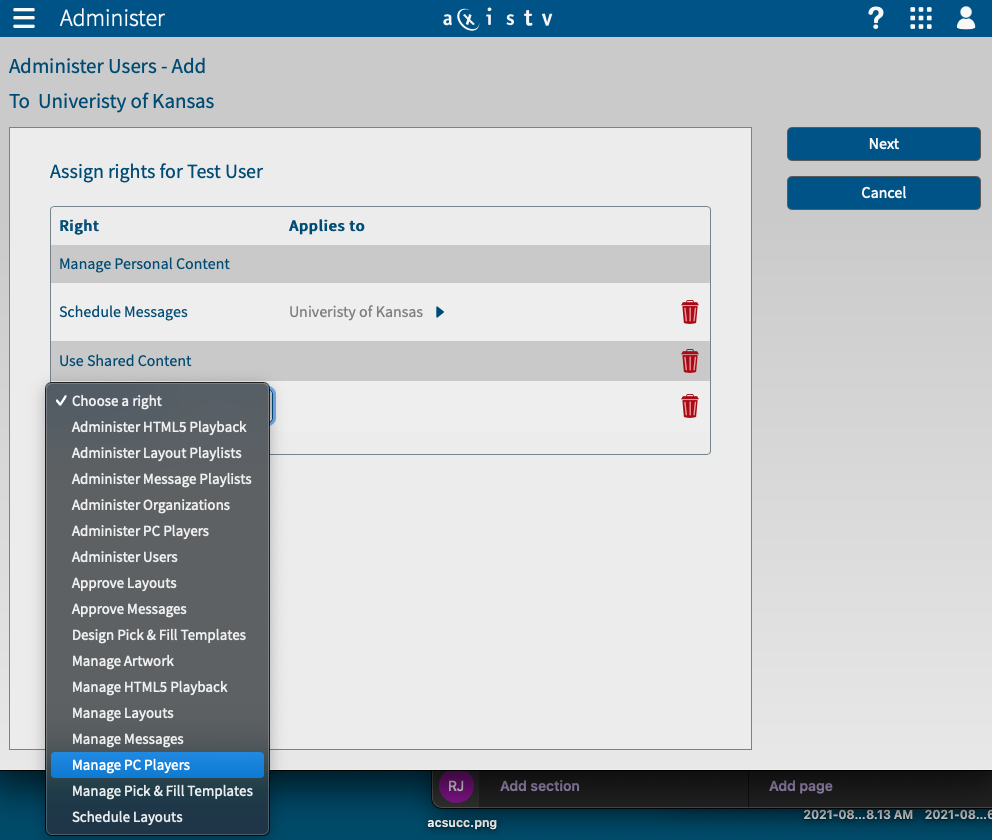
- Select "Signage user or Administrator" and click Next.
- Select the arrow to right of "University of Kansas" (in Schedule Messages row) and choose the appropriate Suborganization.

- Select green "+" sign at bottom, and "choose a right" in the drop-down by selecting "Manage PC Players"

- Select the arrow to right of "University of Kansas" (in Mange PC Players row) and choose the appropriate Suborganization.

- Select green "+" sign at bottom, and "choose a right" in the drop-down by selecting "Manage Messages"
- Select the arrow to right of "University of Kansas" (in Manage Messages row) and choose the appropriate Suborganization.
- Select green "+" sign at bottom, and "choose a right" in the drop-down by selecting "Approve Messages"
- Select the arrow to right of "University of Kansas" (in Approve Messages row) and choose the appropriate Suborganization.
- Click Next button.
- Select "All" then "Next"
- Click Add button